(Download a higher resolution image by clicking on any picture
below.) 
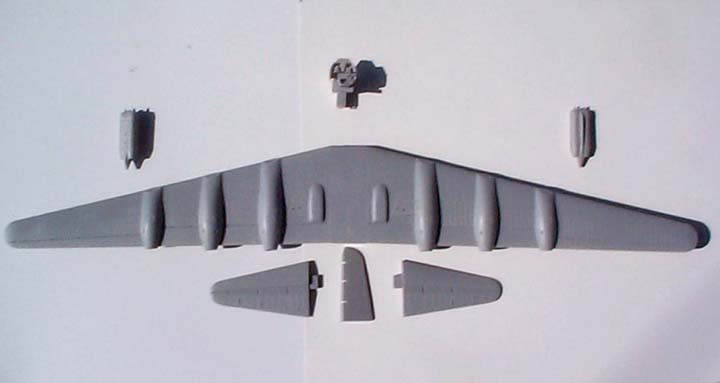
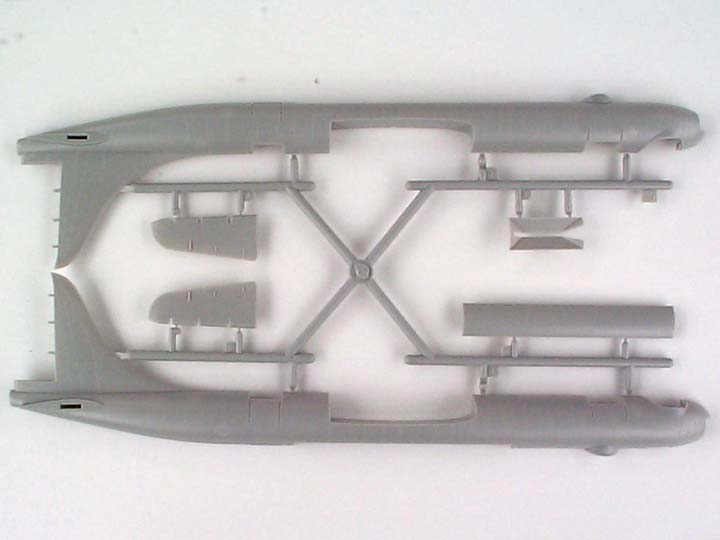 Sprue tree A
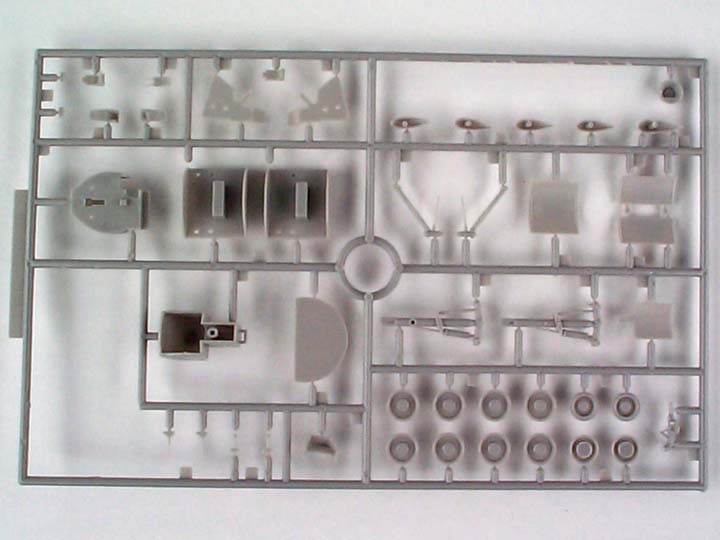
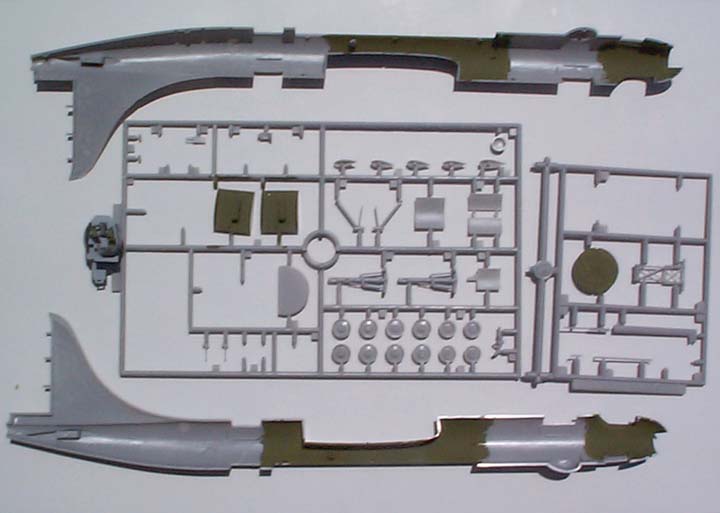
 Sprue tree B
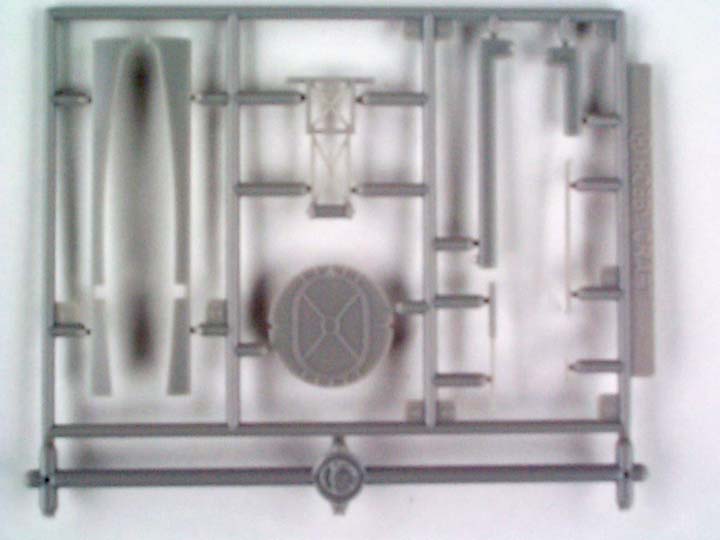
 Sprue tree C
 Two examples of sprue trees E and F and one
sprue tree G. In the B-36B kit, the E trees are replaced with
sprue tree D, which has the early style round tipped propeller
blades and smaller tail radome. The jet engine sprue trees are
not included in that kit.
Two examples of sprue trees E and F and one
sprue tree G. In the B-36B kit, the E trees are replaced with
sprue tree D, which has the early style round tipped propeller
blades and smaller tail radome. The jet engine sprue trees are
not included in that kit.
 The
FICON conversion parts are on sprue tree H.
The
FICON conversion parts are on sprue tree H.
I strongly recomment that you go through the instructions and identify all the places where holes need to be drilled, slots cut out, and extra tabs removed before beginning construction.
 I
started by assembling the cockpit, wings, horizontal stabilizers,
rudder, and jet engine nacelles. I filled and sanded the gaps
along the joining seams and the holes in the main landing gear
doors (parts C5 and C6). I painted the various components of the
cockpit mostly for completeness sake. They are completely
invisible through the painted canopy on the finished model. I
missed cutting the slots for the jet engine pylons and drilling
the holes for the jet nacelle stabilizing struts. I cut those
openings after I finished painting the model.
I
started by assembling the cockpit, wings, horizontal stabilizers,
rudder, and jet engine nacelles. I filled and sanded the gaps
along the joining seams and the holes in the main landing gear
doors (parts C5 and C6). I painted the various components of the
cockpit mostly for completeness sake. They are completely
invisible through the painted canopy on the finished model. I
missed cutting the slots for the jet engine pylons and drilling
the holes for the jet nacelle stabilizing struts. I cut those
openings after I finished painting the model.
 The upper and lower rear turret
bays were opened to ventilate the bomb bay whenever the bomb bay
doors of the GRB-36D were opened for FICON operations. I cut the
lower turret bay doors off each side of the fuselage. I took a
large turret bay door (part C18) from another B-36 kit to use in
this location. I installed the upper and lower rear turret-bay
doors in the open position after painting the model.
The upper and lower rear turret
bays were opened to ventilate the bomb bay whenever the bomb bay
doors of the GRB-36D were opened for FICON operations. I cut the
lower turret bay doors off each side of the fuselage. I took a
large turret bay door (part C18) from another B-36 kit to use in
this location. I installed the upper and lower rear turret-bay
doors in the open position after painting the model.
 I brush painted the interior portions of the fuselage with
Testors Model Master Interior Green (FS 34161). There is a hole
through the bottom of the forward bomb bay bulkhead (part H4)
that the trapeze snubber (part H8) fits into. The hole will be
blocked by a fairing at the front end of the bomb bay. In
retrospect it would have been a good idea to drill another hole
in the bulkhead, higher up and offset slightly to the left,
before installing it into the fuselage.
I brush painted the interior portions of the fuselage with
Testors Model Master Interior Green (FS 34161). There is a hole
through the bottom of the forward bomb bay bulkhead (part H4)
that the trapeze snubber (part H8) fits into. The hole will be
blocked by a fairing at the front end of the bomb bay. In
retrospect it would have been a good idea to drill another hole
in the bulkhead, higher up and offset slightly to the left,
before installing it into the fuselage.
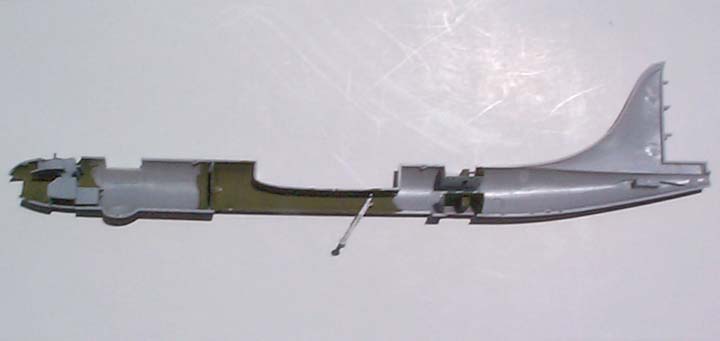 I glued the cockpit, forward bomb bay bulkhead (part H4), and the
turret bay inserts (part C14) into place in the right fuselage. I
glued the second turret bay insert inside the lower turret bay.
I glued the cockpit, forward bomb bay bulkhead (part H4), and the
turret bay inserts (part C14) into place in the right fuselage. I
glued the second turret bay insert inside the lower turret bay.
I inserted the pin of the trapeze drag strut (part H3) into the holes in the fuselage sides but did not cement it into place as I glued the fuselage halves together. I did not install the rest of the trapeze until I finished painting the model.
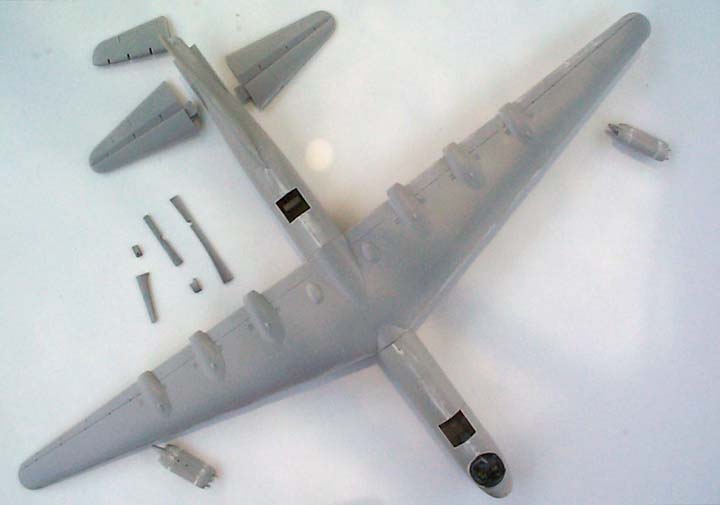
The GRB-36D had a single rear radar dish. I did not install the rear radar fairing and large radome (parts E2, E3, and E6). There are two sprue trees with the small, early type radome included in the B-36B kit, so I took a spare radome (part D2) from the B-model kit.
 As indicated in step 5a, I carved
off forward section of the ventral fairing (part A6) to make room
for the extended trapeze.
As indicated in step 5a, I carved
off forward section of the ventral fairing (part A6) to make room
for the extended trapeze.

 I filled and sanded the joining seam in the fuselage and attached
the wings.
I filled and sanded the joining seam in the fuselage and attached
the wings.
The FICON GRB-36Ds carried guns only in the tail turrret. I left off the forward nose turret (part C4).
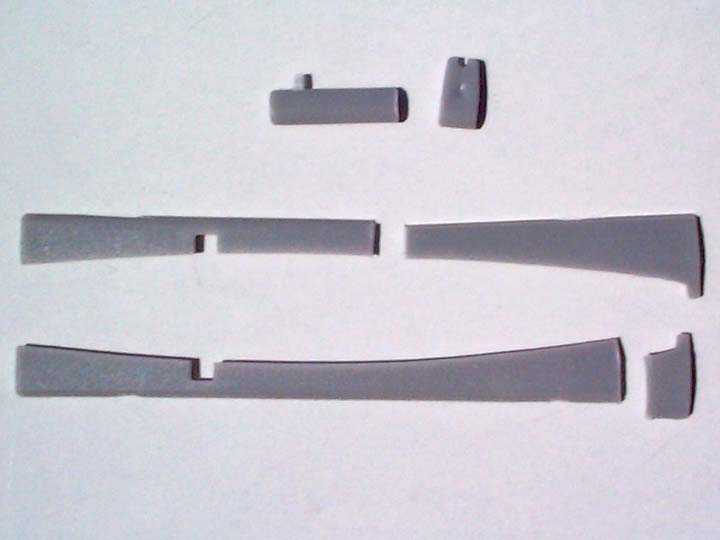 The right side of the trapeze (part
H7 at top) should not have a boom extending forward. I cut the
boom off that part before installing it on the trapeze. The bomb
bay doors (parts H1 and H2) provided in the kit need to be
modified. There was a fixed fairing at the front of the bomb bay.
It extended farther to the rear on the right side of the bomb
bay. I cut the bomb bay doors and glued the front end of each in
place at the front of the bomb bay. I did not install the other
parts of the doors until I finished painting the model.
The right side of the trapeze (part
H7 at top) should not have a boom extending forward. I cut the
boom off that part before installing it on the trapeze. The bomb
bay doors (parts H1 and H2) provided in the kit need to be
modified. There was a fixed fairing at the front of the bomb bay.
It extended farther to the rear on the right side of the bomb
bay. I cut the bomb bay doors and glued the front end of each in
place at the front of the bomb bay. I did not install the other
parts of the doors until I finished painting the model.

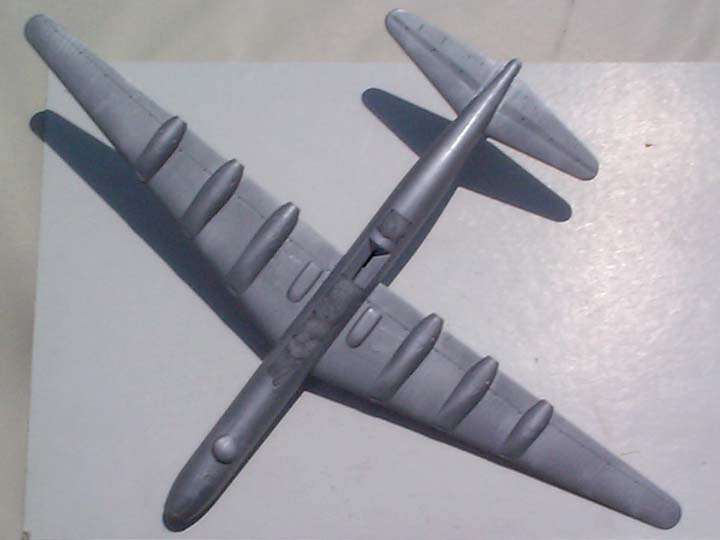
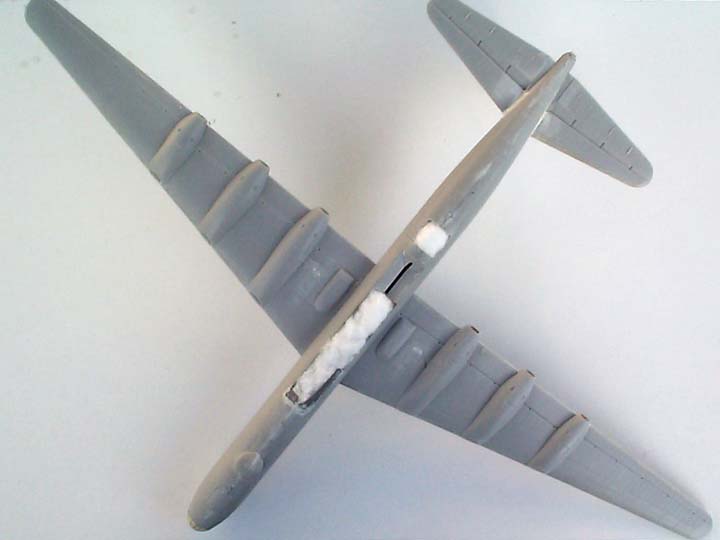 I prepared the model for painting by stuffing
cotton in the bomb bay and turret bays.
I prepared the model for painting by stuffing
cotton in the bomb bay and turret bays.
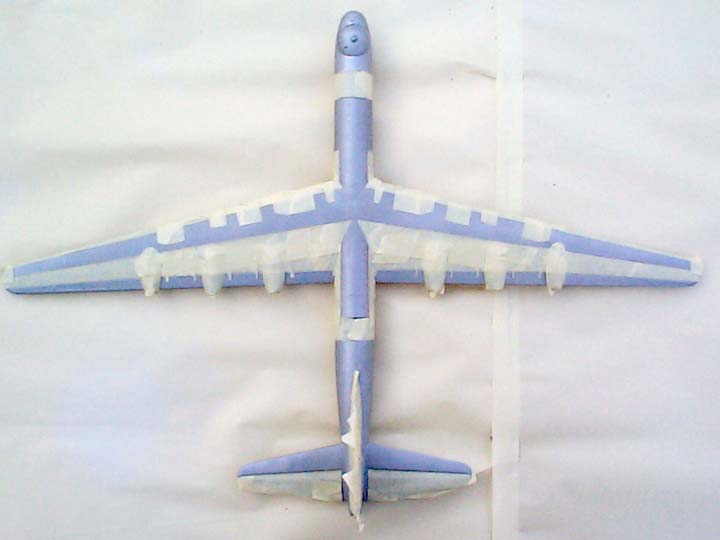
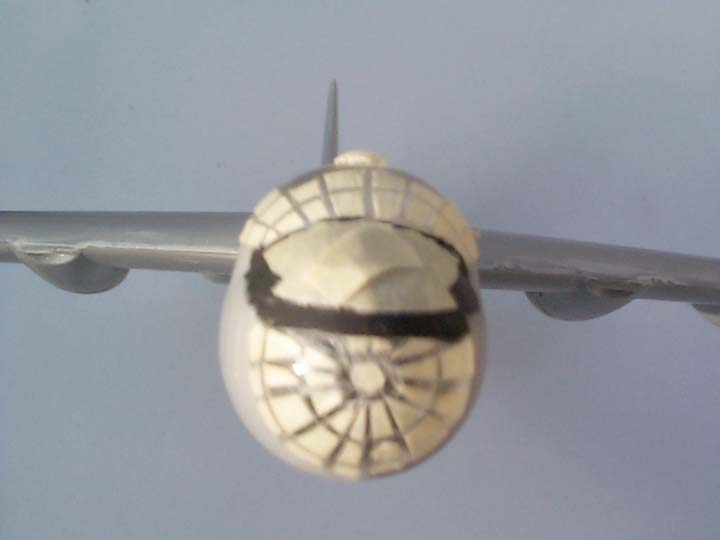 I brush painted flat black over the anti-glare
panel and masked it off. Masking the greenhouse canopy and
bombardier's station was a very intricate task.
I brush painted flat black over the anti-glare
panel and masked it off. Masking the greenhouse canopy and
bombardier's station was a very intricate task.

 I sprayed the entire model with Orchard Supply
Hardware No. 625 Flat Aluminum to represent the areas skinned
with magnesium. The magnesium was painted with aluminum paint on
the actual airplanes. I prefer to start with an enamel paint
because the delicate finish of lacquer-based Testors Model Master
Metalizers is not suitable for masking over.
I sprayed the entire model with Orchard Supply
Hardware No. 625 Flat Aluminum to represent the areas skinned
with magnesium. The magnesium was painted with aluminum paint on
the actual airplanes. I prefer to start with an enamel paint
because the delicate finish of lacquer-based Testors Model Master
Metalizers is not suitable for masking over.
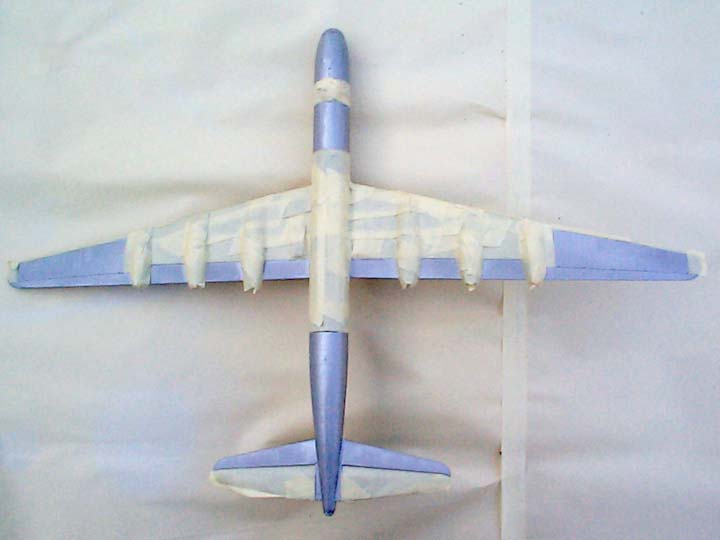 I masked the parts of the airplane
that should remain dull and airbrushed a coat of Testors Model
Master Metalizer Buffing Aluminum onto the rest.
I masked the parts of the airplane
that should remain dull and airbrushed a coat of Testors Model
Master Metalizer Buffing Aluminum onto the rest.
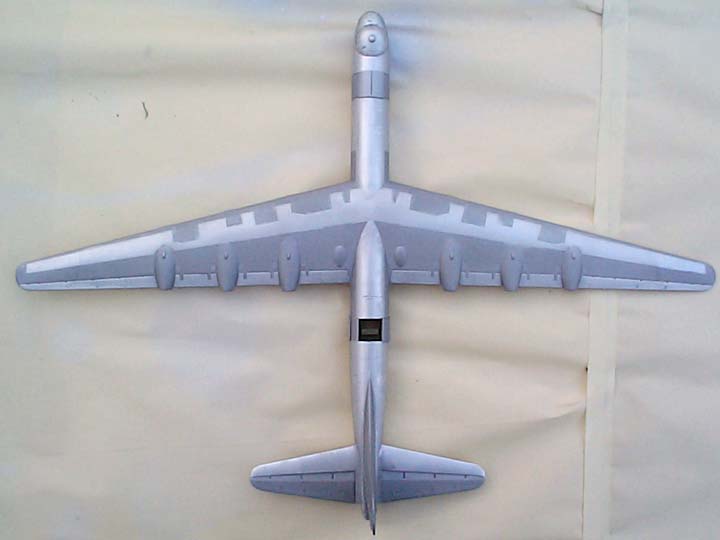
The pressurized camera compartment that took the place of the forward bomb bay in the RB-36 was skinned in aluminum instead of magnesium. The bare aluminum had a more reflective surface. The standard bomber version was skinned in magnesium all the way from the forward turret bay to the rear turret bay. The auminum skinned fuselage section behind the forward turret bay makes it easy to distinguish the RB-36 from the B-36 bomber.
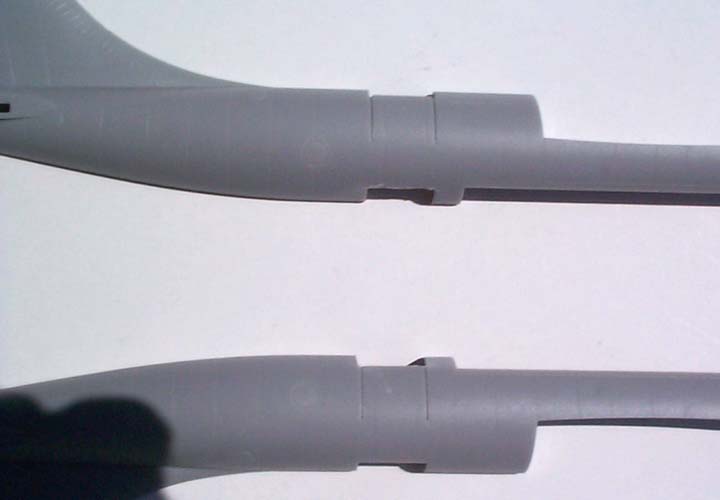
I airbrushed the jet engine nacelles and pylons with Testors Model Master Metalizer Magnesium on the front end and Testors Model Master Metalizer Burnt Metal on the rear end prior to installing them on the wing.
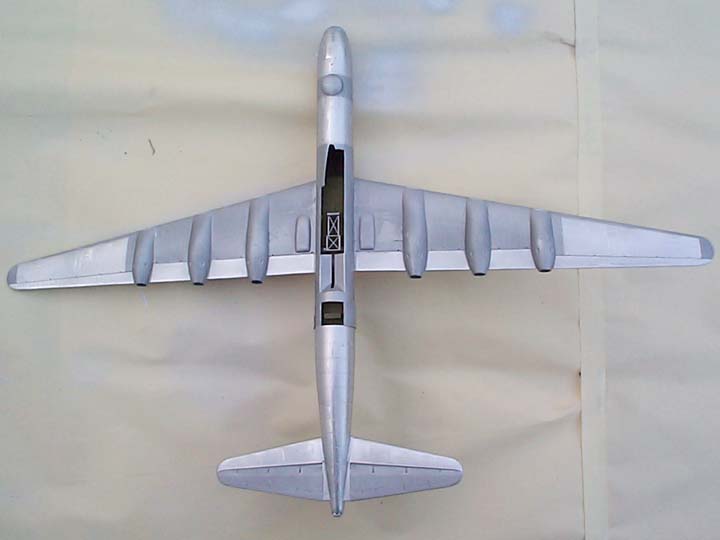 Note the fixed fairing at the front of the bomb
bay.
Note the fixed fairing at the front of the bomb
bay.
GRB-36Ds typically had all of the sighting blisters removed except for the two lower rear blisters on either side of the rear compartment. The instructions suggest that you should use circular black decals under the transparent blisters. After I completed painting the model I carved open holes for the two lower rear sighting blisters. The plastic is molded thinner where the blisters go. I glued the transparent blisters in place over the holes. I used decals for replacement panels with windows at the other blister locations.
Before applying the decals, I glued some of the remaining detail parts onto the model; the rear turret bay doors, the radome under the nose, the three radomes under the rear fuselage, and an additional radome on upper fuselage for AN/APX-29 rendezvous radio antenna. Fortunately, the kit includes an extra radome. The mating slots on the rudder should be shaved a little wider before it is glued in place.
I applied the decals before installing the jet engine nacelles, propellers, and the trapeze. There is intricate black striping on the upper surface of the wings that required a very long time to apply and is easily damaged by any careless handling.
There are big problems with the decal sheet for this kit. To begin with, the kit includes B-36 tail number decals for 492077, which is not the tail number of any B-36.
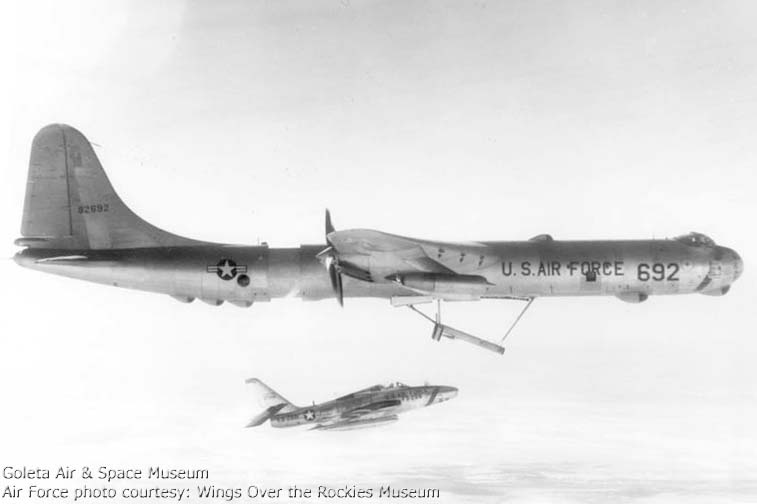
 I think that they meant to include the tail
number of 49-2707, which was the sole GRB-36F FICON prototype.
Photo courtesy Air Force Museum via Jim Solenberger.
I think that they meant to include the tail
number of 49-2707, which was the sole GRB-36F FICON prototype.
Photo courtesy Air Force Museum via Jim Solenberger.
The decal sheet has the appropriate Air Force marking decals to model the GRB-36F, rather than any GRB-36D.
The GRB-36F lacked bomb bay doors and the ventral fairing and had a different trapeze. The GRB-36F never flew with an RF-84K Thunderflash, only with F-84E Thunderjet, 49-2115 and the sole YRF-84F Thunderstreak prototype, 49-2430. The YRF-84F can be modeled by grafting the wings and tail surfaces of an F-84F onto the fuselage of an F-84E, but I don't know of any kits of those airplanes in 1/144 scale.
Ten GRB-36Ds were converted; 44-92090, 44-92092, 44-92094, 49-2687, 49-2692, 49-2694, 49-2695, 49-2696, 49-2701, and 49-2702. Due to delays in the delivery of the trapeze mechanisms, it appears that only 44-92090, 49-2692, 49-2694, 49-2695, and 49-2696 conducted FICON retrieval operations, so those are the best candidates for modeling.
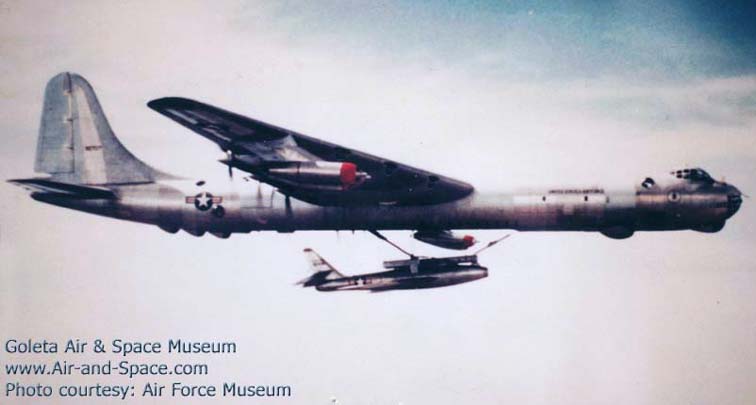
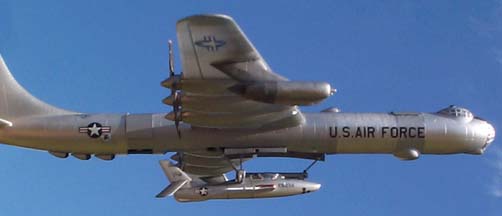
 The most famous FICON photographs
show GRB-36D, 49-2692 of the 348th Strategic Bombardment Squadron
(Heavy) based at Fairchild AFB with RF-84K, 52-7266 of the 91st
Strategic Reconnaissance Squadron (Fighter) based at Larson AFB.
Photo courtesy Wings Over the Rockies Museum.
The most famous FICON photographs
show GRB-36D, 49-2692 of the 348th Strategic Bombardment Squadron
(Heavy) based at Fairchild AFB with RF-84K, 52-7266 of the 91st
Strategic Reconnaissance Squadron (Fighter) based at Larson AFB.
Photo courtesy Wings Over the Rockies Museum.
The decal sheet included in the kit includes the tail number and buzz number for RF-84K, 52-7266 but not for GRB-36D, 49-2692.
GRB-36D, 49-2692 carried the white-starred, blue sash of the Strategic Air Command with the SAC shield on the left side of the nose and the shield of the 99th Bomb Wing on the right side. The decal sheet has two versions of the SAC shield; a four color decal and a pair of decals with the black linework separate from the colors. The decal sheet does not have decals for the blue sash or the 99th Bomb Wing shield. It does not have the large U. S. AIR FORCE decal for the forward fuselage of the GRB-36D.
If you want to model a GRB-36D from the 348th SB(H)S, you will need to come up with decals for:
tail number
buzz number
SAC sash
99th Bomb Wing shield
U. S. AIR FORCE
Hobbycraft's B-36D/RB-36H kit includes decals for the SAC sash and the large U. S. AIR FORCE.
RF-84K, 52-7266 and the other RF-84Ks of the 91st SRS(F) carried the blue sash of SAC on both sides of their noses, but they did not carry the SAC shield. The decal sheet does not have decals of the blue sash for the RF-84K.
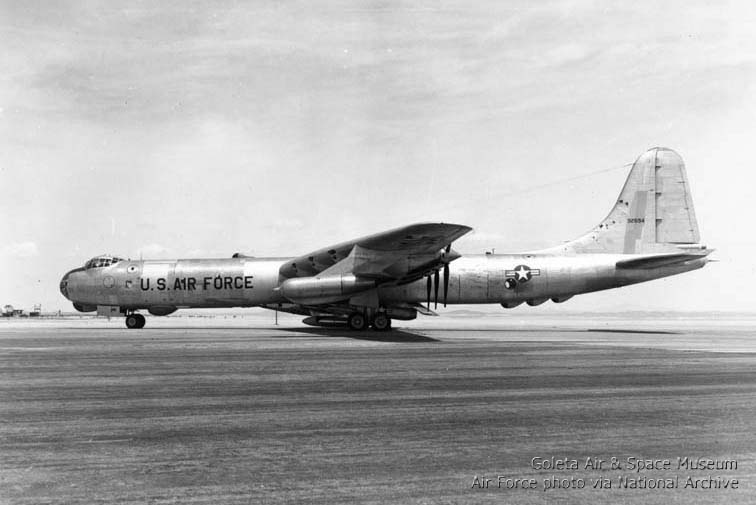 Since I have a particular
fascination with the history of Edwards Air Force Base, I chose
to model 49-2694, which was assigned to the GRB-36D performance
evaluation at the Air Force Flight Test Center. It did not carry
the SAC shield, bomb wing shield, or buzz number that adorned the
GRB-36Ds of the 348th SB(H)S. Since the decal sheet does not
include the large U. S. AIR FORCE decals for the sides of the
fuselage, I scanned, resized, and printed a copy of a decal from
another kit with an ALPS ribbon-ink printer. I also printed
custom tail number decals for the GRB-36D and RF-84K. Photo via
National Archives.
Since I have a particular
fascination with the history of Edwards Air Force Base, I chose
to model 49-2694, which was assigned to the GRB-36D performance
evaluation at the Air Force Flight Test Center. It did not carry
the SAC shield, bomb wing shield, or buzz number that adorned the
GRB-36Ds of the 348th SB(H)S. Since the decal sheet does not
include the large U. S. AIR FORCE decals for the sides of the
fuselage, I scanned, resized, and printed a copy of a decal from
another kit with an ALPS ribbon-ink printer. I also printed
custom tail number decals for the GRB-36D and RF-84K. Photo via
National Archives.
 In the blow-up of the picture above you can see the
badge of the Air Research and Development Command just forward of
the U. S. AIR FORCE. The ARDC badge also appears on the right
side of the nose.
In the blow-up of the picture above you can see the
badge of the Air Research and Development Command just forward of
the U. S. AIR FORCE. The ARDC badge also appears on the right
side of the nose.
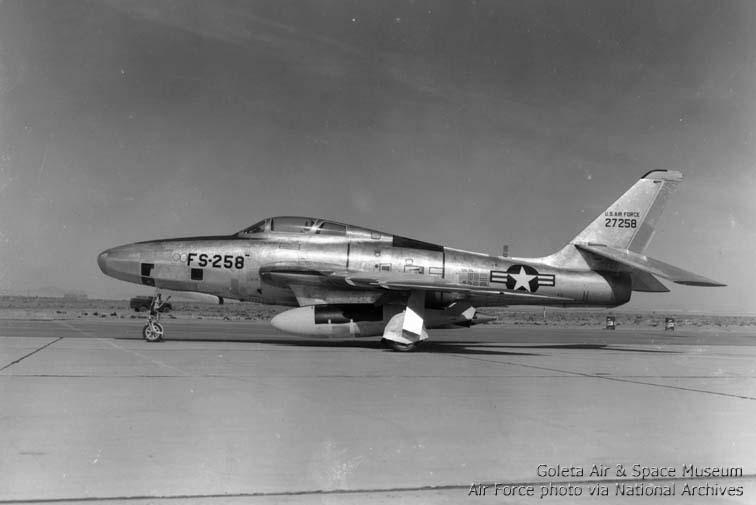 RF-84K, 52-7258 was used for the performance
evaluation tests with GRB-36D, 49-2694 at Edwards Air Force Base.
Air Force Photo B-161916AC via National Archive.
RF-84K, 52-7258 was used for the performance
evaluation tests with GRB-36D, 49-2694 at Edwards Air Force Base.
Air Force Photo B-161916AC via National Archive.
Construction of the trapeze was a little challenging. The fixed fairing at the front of the bomb bay blocks the hole in the forward bulkhead that the end of the trapeze snubber should fit in. I had to drill another hole in the bulkhead of the already assembled model.
I glued the propellers in place. This is not a model that you want people to spin the props on. Something on it will break or some decals will come off if it is not handled very carefully.
After attaching the bomb bay doors, the delicate tail guns were the very last parts that I glued onto the GRB-36D. Then I glued the RF-84K onto the trapeze.
Now that I have seen the assembled model, I would make more changes to the next one. The nose hook should be mounted farther aft on the RF-84K. The trapeze boom should be shorter. The main jack and drag strut should be mounted farther forward in the bomb bay. The ventral fairing is not the correct shape. It would be possible to scratch build a better one using the unneeded bomb bay door insert (part A5).
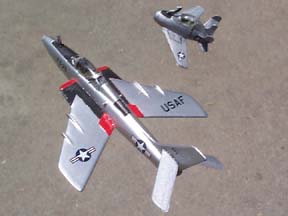 Part 1: Republic RF-84K
Thunderflash and McDonnell XF-85 Goblin
Part 1: Republic RF-84K
Thunderflash and McDonnell XF-85 Goblin
 Part 3:
Completed GRB-36D, 49-2694 and RF-84K, 52-7258
Part 3:
Completed GRB-36D, 49-2694 and RF-84K, 52-7258
Main page of Hobbycraft FICON review
-advertisement-
You can buy a 2020 calendar featuring historic Air Force and Convair photographs of Project FICON Convair GRB-36 carrier aircraft and Republic F-84 parasites.
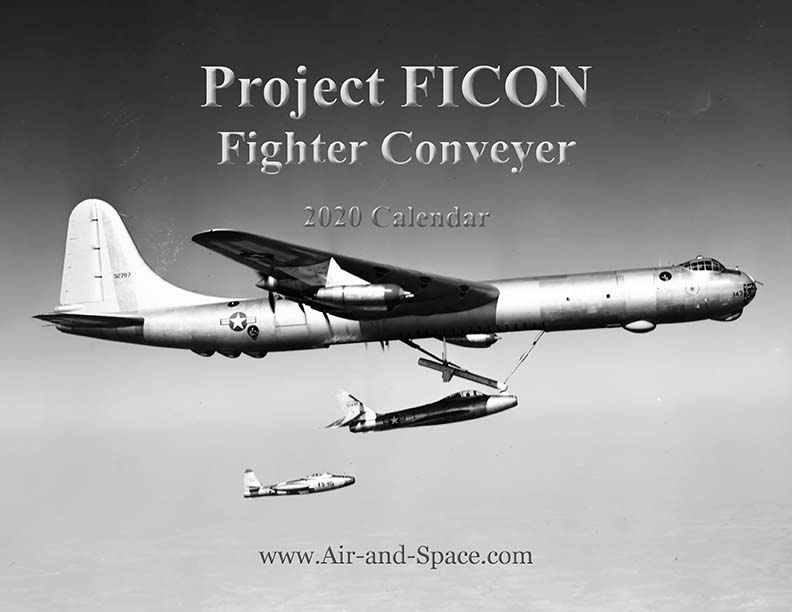
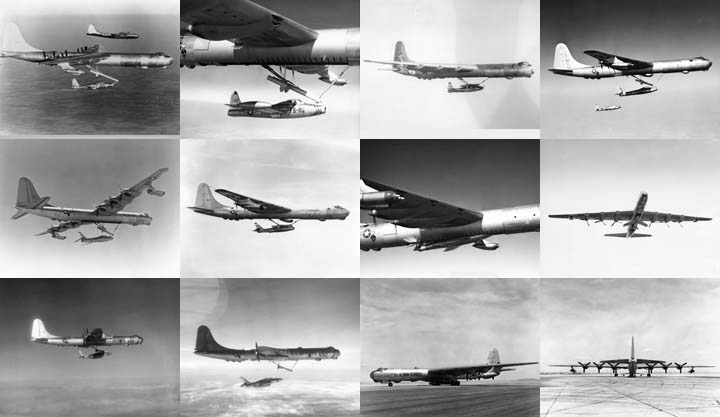
A dozen Air Force and Convair photographs of Project FICON Convair GRB-36 carrier aircraft and Republic F-84 parasites from 1952 to 1956:
Convair GRB-36F 49-2707 and Republic F-84E Thunderjet 49-2115 at Forth Worth, Texas and Eglin Air Force Base, Florida
Convair GRB-36F 49-2707 and Republic YRF-84F Thunderstreak 49-2430 at Fort Worth, Texas and Dayton, Ohio
Convair GRB-36D 49-2962 and Republic RBF-84F Thunderflash 52-7266 over Washington State
Convair GRB-36D 49-2694 and Republic RF-84K Thunderflash 52-7258 at Edwards Air Force Base, California
 Put a copy of the Project FICON - Fighter Conveyer: 2020 calendar in your Lulu.com shopping cart for $14.95.
-advertisement-
Send a message to Brian.